Maple Syrup Honeycomb

Honeycomb Recipe

Ingredients:

1 cup sugar
55ml honey
40ml maple syrup
60g butter
1/2 tbs baking soda
250g chocolate, melted

Method:
Put the sugar, butter, syrup and honey into a pot and stir over medium heat.
Simmer for 5-7 minutes or until mixture reaches 150C (300F) on a sugar thermometer.
Take off the heat.
Add bi-carb soda.
Stir until golden and foamy.
Pour into a cake pan that has been lined and greased.
Set aside till cooled and hard.
Top with chocolate.

IMG_2222


Notes on the Recipe
I would use milk chocolate, simply because I feel the whole thing would be too rich if you used dark chocolate. But you can use dark chocolate.
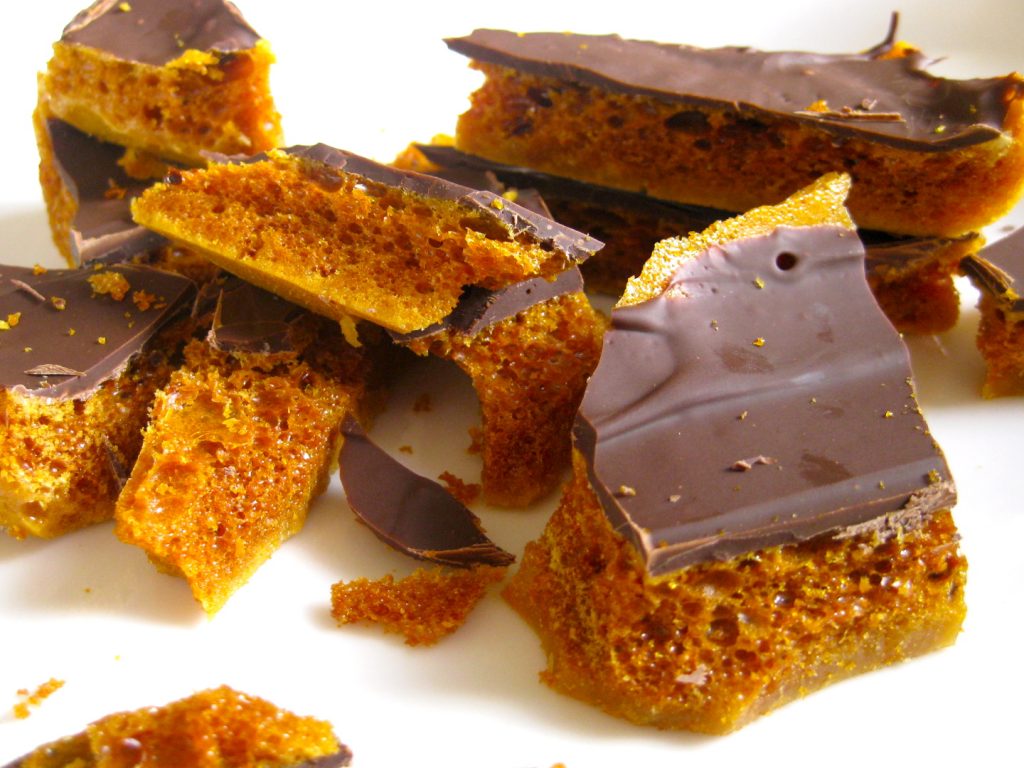
This honeycomb has a little sharper flavour to it, I assume because of the maple syrup. It’s more Crunchie than Violet Crumble.
It goes a bit mental when you chop it, so don’t expect neat and tidy squares, rather irregular shards.
I salted my mixture…don’t know if this makes a difference, but I like to salt super sweet things.
This mixture doubles easily.
I tried making cookies with this honeycomb, but they didn’t work out so well. All the honeycomb melted and left huge craters in the cookies.


17 thoughts on “Maple Syrup Honeycomb”

  • Absolutely DELICIOUS!!!

    And I consider myself somewhat of a Crunchie connoisseur!

    Big congrats sister woman, very good!

  • I made this recipe and I managed to screw it up quite spectacularly. I wrote about it here. I blame my horrible skills with the candy thermometer and not the recipe.
    The candy was still delicious, even though it did not turn out the way it was intended. Thank you for sharing the recipe!

    • I’m sorry it didn’t work out for you, don’t worry you’re not the only one. Maybe I got lucky to have such luck on my first try!
      I think the main problem was that you didn’t stir in the bi-carb well enough, you should mix until golden and foamy. It should go all weird and spongy like that spray on roof insulation.
      The colour also looked like it needed a little more cooking BEFORE you added the bi-carb, which is 300F/150C.
      And finally, the pan was too big. I used a square cake pan, and piled it all in. Or you could double the quantity and use a slice pan.
      Try it again keeping this in mind and let me know how you go.

    • It does keep for a day or two (maybe three) , depending on the humidity. Let me know how you go, and if you had any problems with it, as I want to put as many trouble shooting tips in the notes as possible!

  • Thanks for the swift reply 🙂 Wellllllllllllll, not good my first attempt, Im about to go back and do it again stright away, as it all looked rather promising until it went hard.. lol, its like a caramel, but really thick, Im feeling I underdid the bicarb so will attempt again now with a tad more, looks like it needs more air, also tastes a bit bitter, maybe on the burnt side so heat down a little too me thinks, Will report back again soon, Im determined to master this 🙂 Cheers

  • Ok, well…. bit better, outside layer still seems waaaaay too thick/crunchy with a smidgen of honeycomb in the centre?

    • Hi Michelle,
      thanks for the info! I made some again myself this morning, and will put up some pictures of how it went. It took me ten minutes from the moment I put it on the heat, till it was ready. The colour is a big indicator that it’s ready, it turns very dark golden in colour. Use you sugar thermometer if you don’t want to guess. I will post pictures soon. Perhaps you didn’t stir the bi-card in enough…you don’t have to be delicate, stir until it reminds you of that yellow, spray on insulation.

Leave a Reply

Your email address will not be published.

This site uses Akismet to reduce spam. Learn how your comment data is processed.